
Domestic Details: How to Roast Garlic
This post may contain affiliate links. Read about my affiliate policy.
 Roasted garlic is a truly beautiful thing, friends. If you’ve never tried it, I’m unattractively jealous because you are in for a magical, life-changing culinary experience.
When you roast garlic, all kinds of wonderful things happen. As the garlic softens in the oven, its aggressive flavors mellow significantly, and what you end up with when you pull the gorgeously caramelized head from the oven is a nutty, slightly sweet spread. This roasted garlic paste is almost buttery in both flavor and texture, and it is beyond glorious. Plus, it will make your kitchen smell like some sort of intoxicating dreamland. For real.
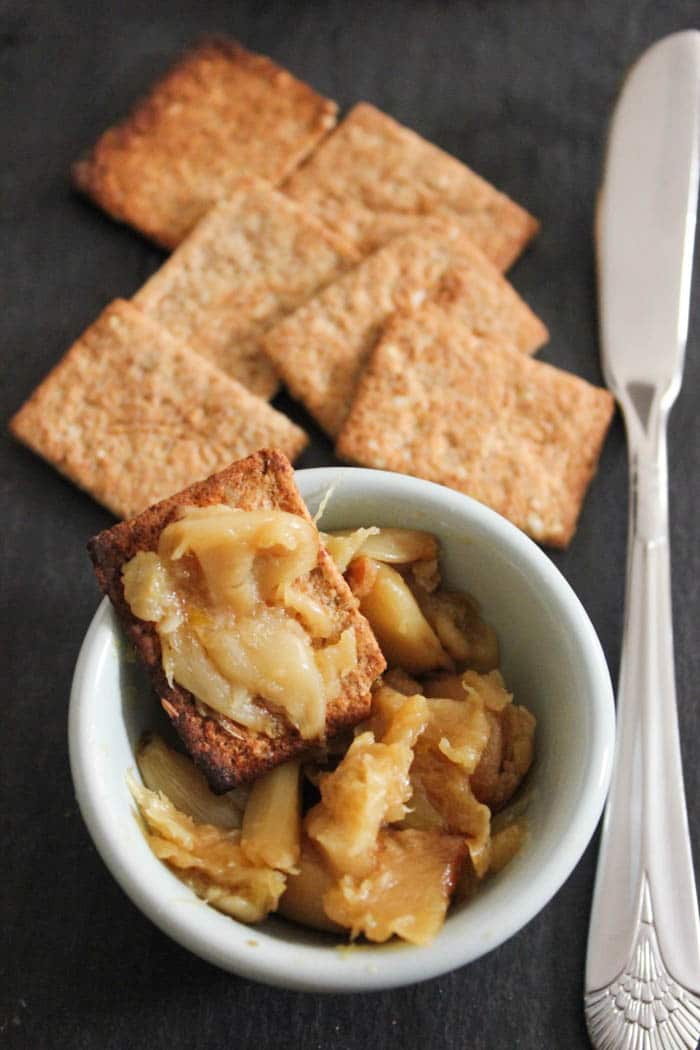
The truth is, we all need a little more roasted garlic in our lives. This stuff has the ability to take all of your favorite recipes to the next level, and “Roasted Garlic (insert food here)” just sounds fancy. Spread it on sandwiches, toss it with spaghetti and olive oil (so bomb), mix it with butter, or try whisking it into vinaigrettes, dips and sauces. PUT IT ON PIZZA. If you’re feeling rustic, simply spread the roasted garlic onto toasted baguette slices or crackers with a pinch of coarse salt and get weird. You really can’t go wrong.
Luckily, roasting garlic is ridiculously easy, and it’s an impressive domestic skill that you should add to your repertoire immediately. For your convenience, I’ve included a step-by-step garlic-roasting tutorial below. Get on it.
Roasted Garlic: (Yields about 1½-2 tablespoons of roasted garlic paste)
Ingredients:
1 head of garlic
1 tablespoon extra virgin olive oil
Kosher salt
Fresh ground pepper
Preparing your Roasted Garlic:
-Pre-heat the oven to 375 degrees.
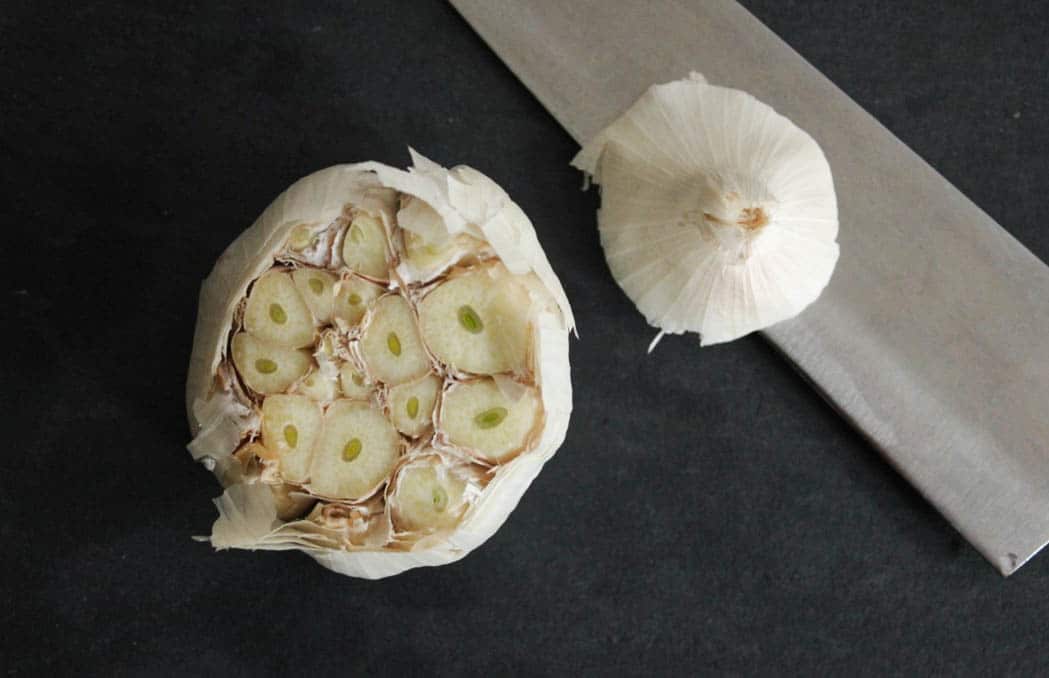
-Place the head of garlic on a cutting board.
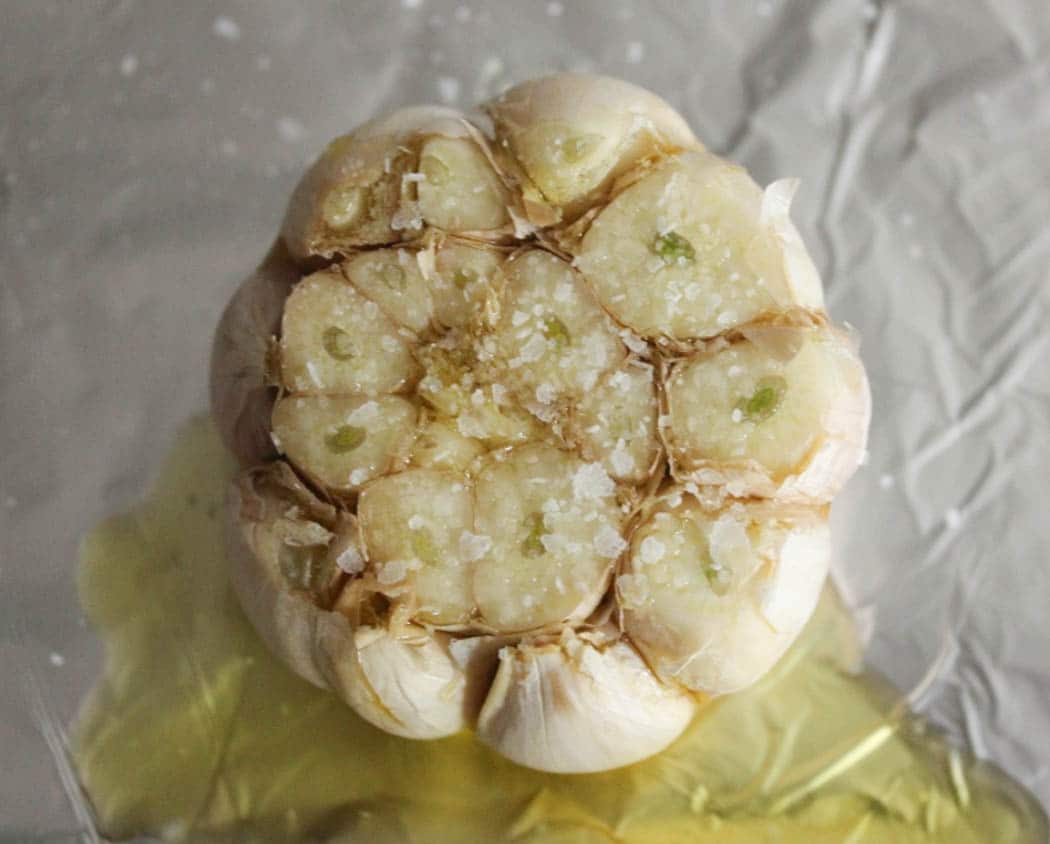
 -Using a sharp knife, slice about ½-inch off the top of the head of garlic, so that the cloves are exposed.
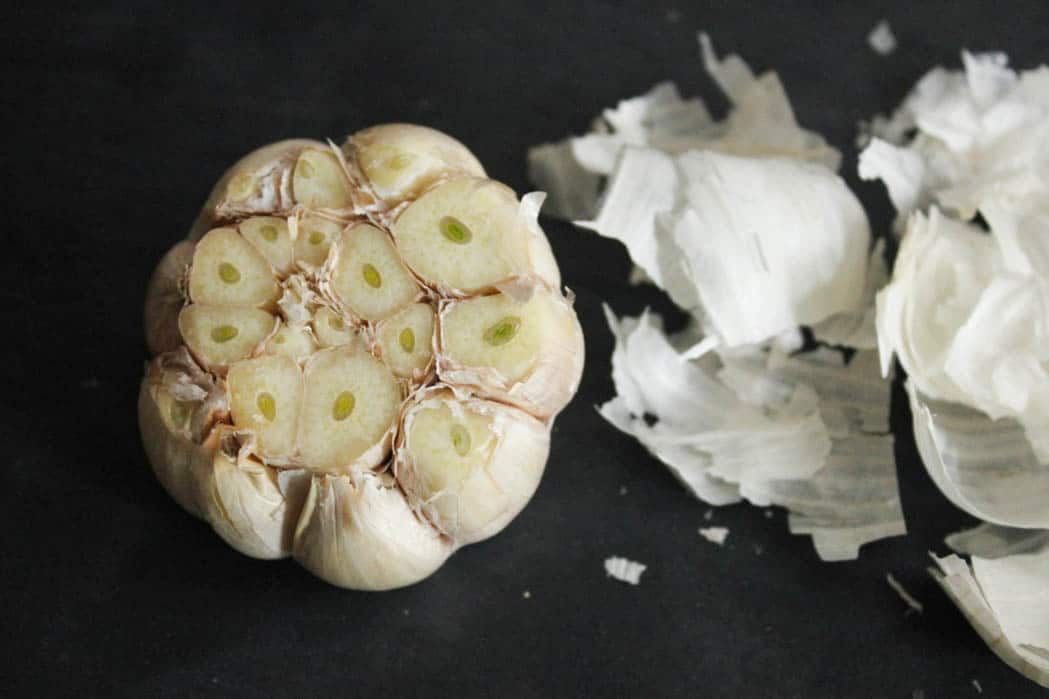
 -Remove any excess papery skin from the head of garlic.
 -Place the garlic on a sheet of heavy duty aluminum foil and drizzle the exposed cloves with olive oil. I like to use my fingers to make sure the oil really soaks in there. Relax, it’s cool if some oil dribbles out.
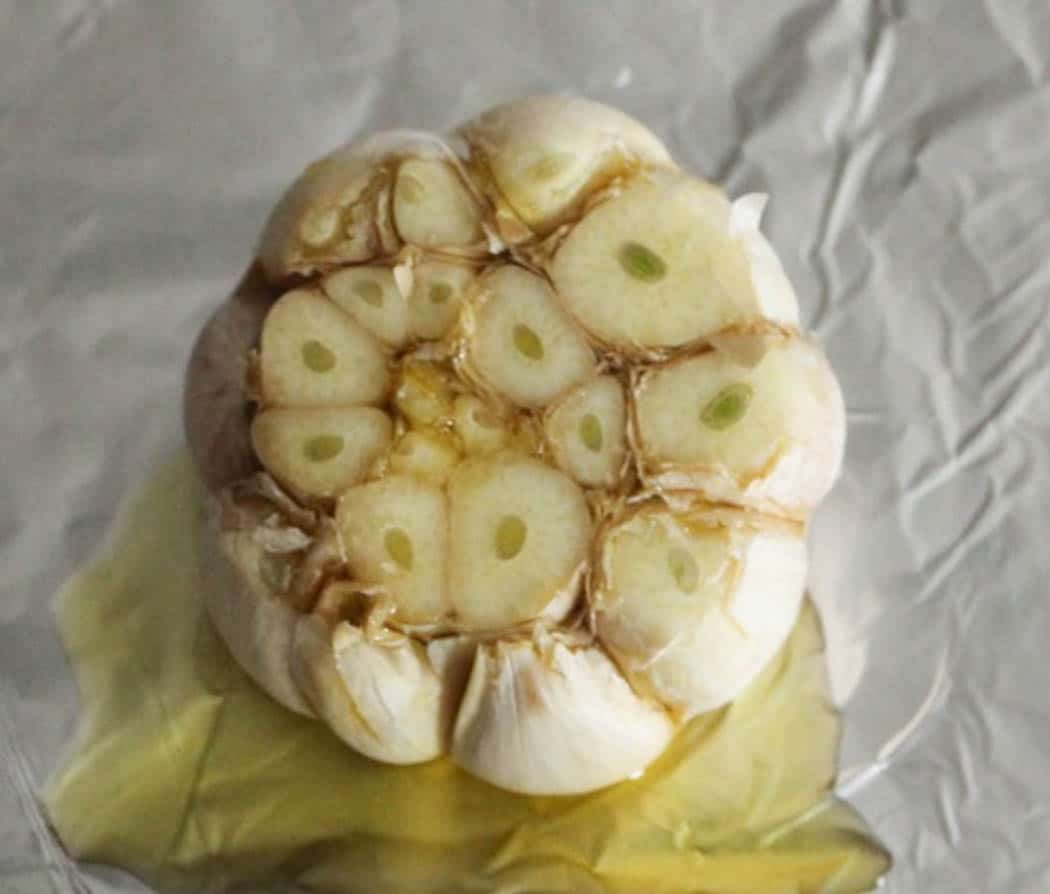 -Sprinkle some salt on that bad boy, and add a little fresh ground pepper too if you’re into that.
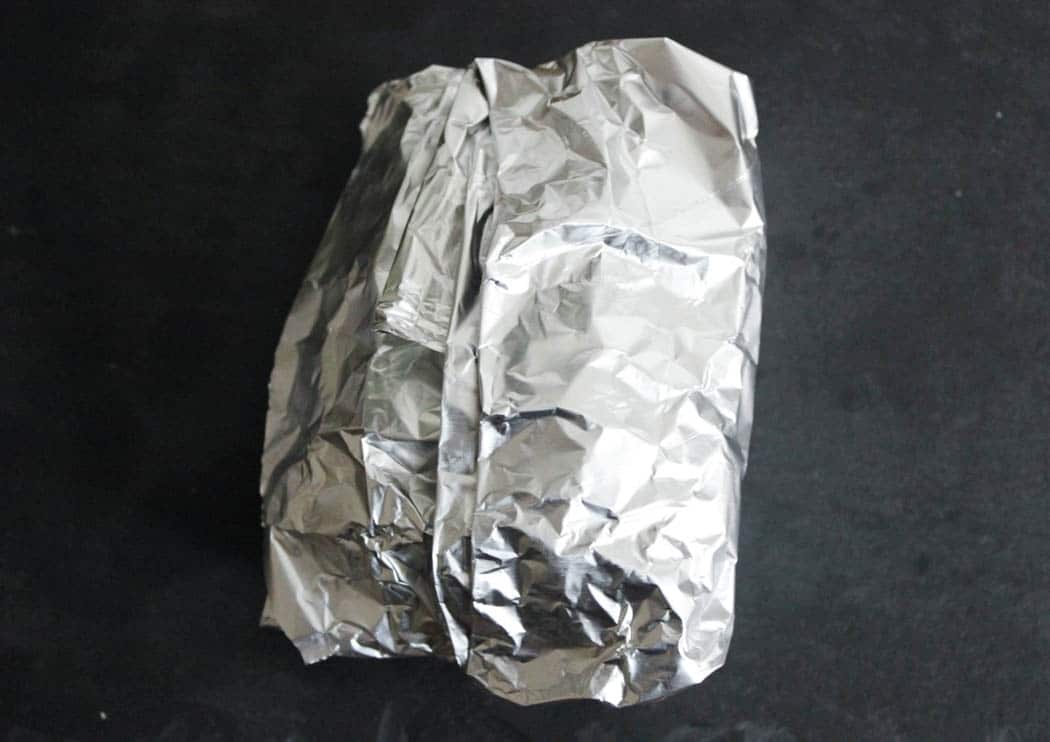
 -Wrap the foil around the garlic so that entire head is loosely enclosed in a sealed “package.” If you’re roasting multiple heads of garlic at a time (good for you!), put them in a pie pan or baking dish and cover the dish with foil.
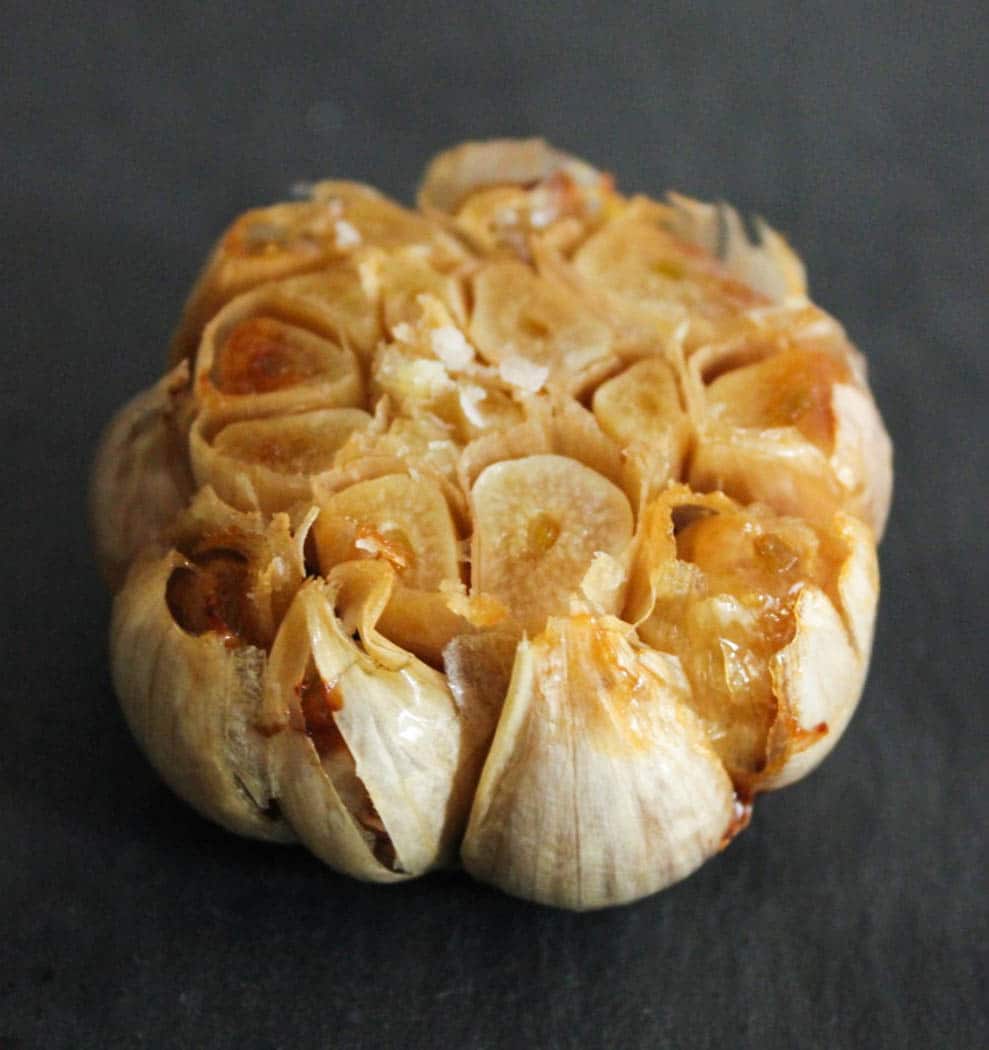
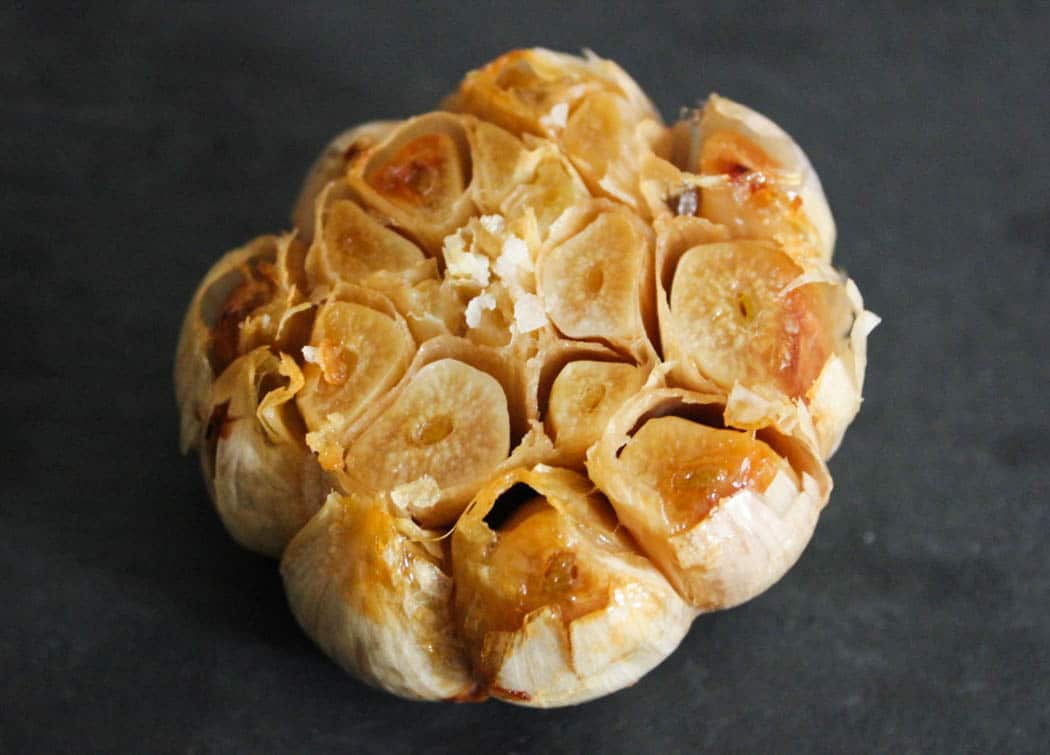
 -Transfer the garlic to the oven and roast for 45 minutes until the cloves are very soft.
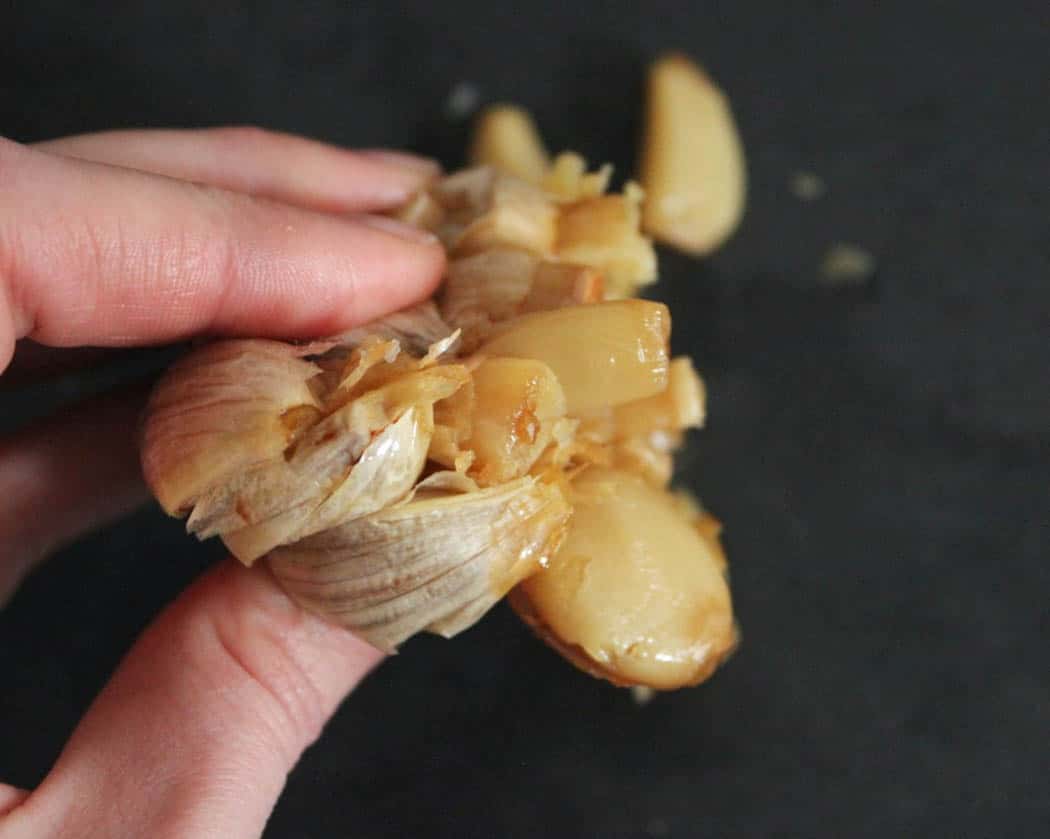
 -When cool enough to handle, squeeze the head of garlic at the base and the roasted cloves will pop right out of their skin. Magic! (They may be more “paste” than whole cloves, but that’s a good thing.)
 -I like to gently mash the roasted garlic with a fork to form a paste before mixing it into sauces, dressings, soups, casseroles, etc. Or you could just grab a knife and spread the gloriousness on crusty bread or crackers…
 Domesticity is all in the details, friends. Bow to your sensei.
*If you have a burning question that you’d like featured on a future edition of Domestic Details, don’t hesitate to contact me or leave it in the comments. Help me help you.
Shop this post
Never miss a post!
Get new recipes and lifestyle tips delivered straight to your inbox.
I loved your talk for the College of the Atlantic at Beech Hill farm
Thank you, Suzanne! I’m so happy you enjoyed it!!
That’s exactly how I roast my garlic too. So delicious.